|
You can install your site's SSL certificate in a few simple steps within the customer control panel. Before doing so, you will need to obtain the following:
- Ability to update DNS records for domain
- Private Key
- Certificate
- Chain Certificate
This article assumes that you are already familiar with how to log in to the customer control panel. If you do not know how to log in or have forgotten your password, please refer to this article first.
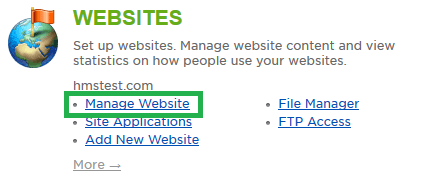
- On the control panel Home tab, click "Manage Website" under the Websites section.
- Click on "Web Hosting Settings".

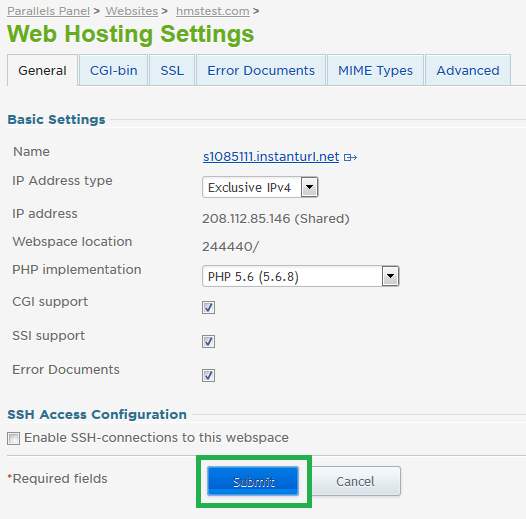
- Click the Edit button. You will see a drop-down menu next to the IP address type line. Change this from the Shared IP to Exclusive IPv4, then click Submit. If this option is not available, please contact our support team to enable it for you.
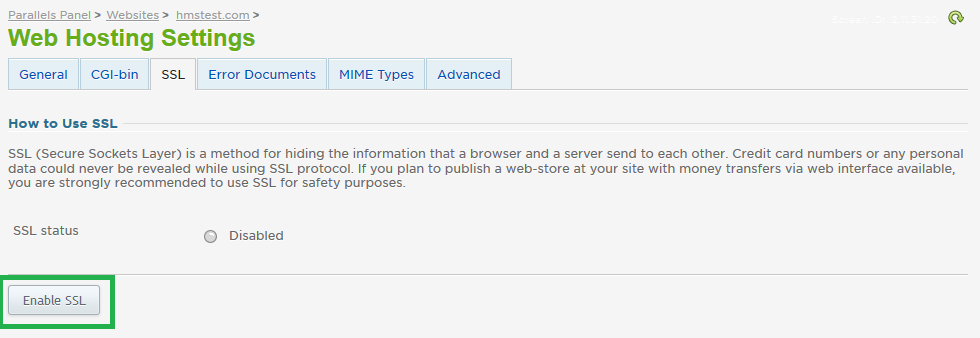
- Once submitted, you will see a new IP address (save this for later), and a new tab will appear on the Web Hosting Settings Page. This tab is labeled as SSL. Select this tab, then click "Enable SSL".
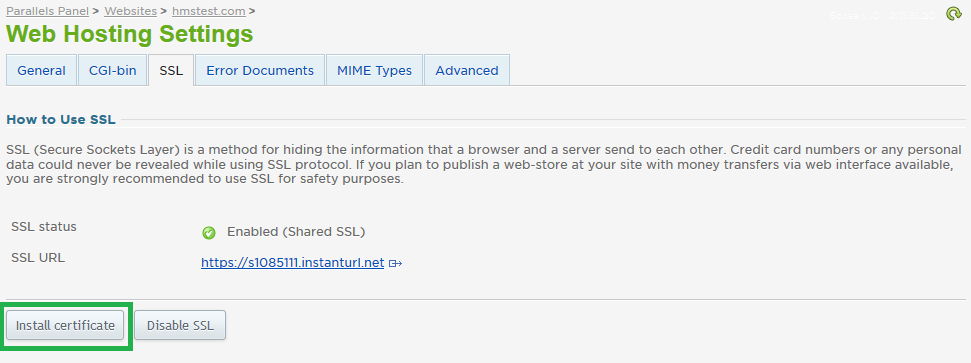
- Select "Install Certificate".
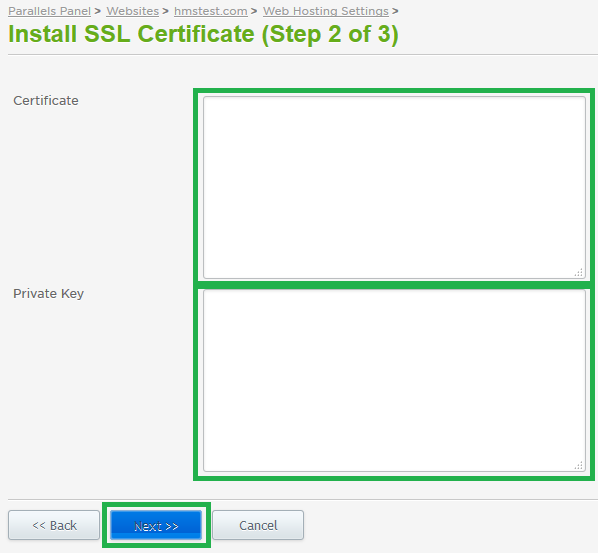
- You will be given options to install the SSL in a few different ways. Select one, then click Next. You will need to then upload or fill in your SSL certificate and key information.
- Install from Repository - this will only be available if you have uploaded your SSL file via the steps listed here.
- Install from File - this allows you to browse to your local computer to upload the SSL certificate and key files
- Install from Clipboard - this is the easiest method, as you only need to copy and paste the SSL and key information. For this KB, I will be using this method.
- Click Next, then click Finish to confirm installation. You can install your chain certificate in the same way, by then clicking "Install CA Certificate" from the SSL screen. The chain certificate should be included with your SSL zip file as "chain.cer" - this additional certificate is needed by some web browsers to fully validate the SSL for the end user.
- Now that the SSL certificate is installed, the next step is to update your site's A record to point to the new IP obtained earlier (you can easily find this IP again by going back to the Web Hosting Settings - General screen). If you are using HostMySite's Name servers (ns1-3.hmsns.com), this will be done automatically. Wherever your DNS is hosted is where you will need to update the record - you can find out where your DNS is hosted by contacting your domain registrar, or Hostmysite's support team can look this up online for you. Once the record has been updated please allow a few hours before testing the site with the SSL. After propagation, try to browse your site using https:// rather than http://.
If you have any further questions that were not answered in this article, please contact us.
| 