|
There is no automated way to migrate email from Smartermail to Exchange. The most efficient way to move email between the two environments is to download all of your email into Outlook and then export that data into a .pst file, which can then be imported to Exchange. This article applies to Outlook versions 2003, 2007, 2010, and 2013. The only difference in options between 2003/2007 & 2010/2013 will be the very first step - how to open the Import and Export wizard.
Exporting your email into a .pst file
Importing your .pst into Exchange using Outlook
Exporting your email into a .pst file
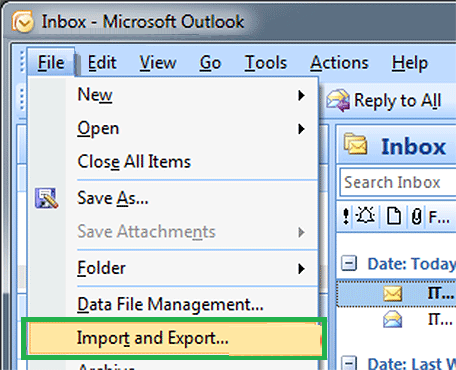
- For Outlook 2003 & 2007:
- Select "Import and Export" from the File menu.
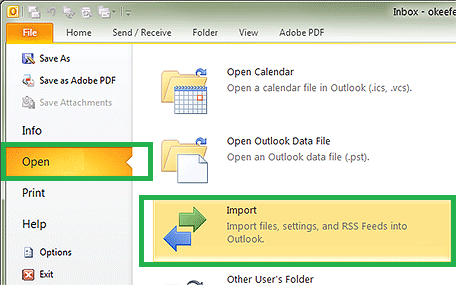
- For Outlook 2010 & 2013:
- From the File tab, click "Open", then "Import".
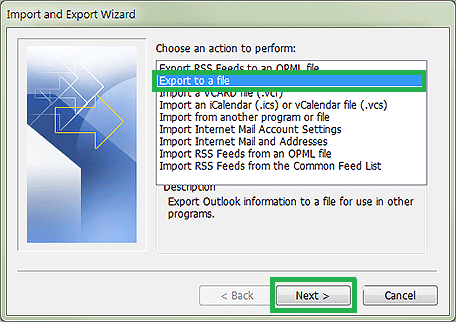
- Select "Export to a file", then click Next.
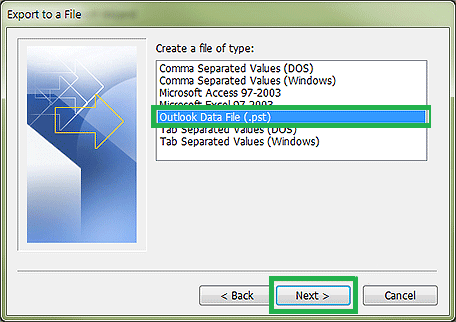
- Select "Outlook Data File (.pst)" from the list, then click Next.
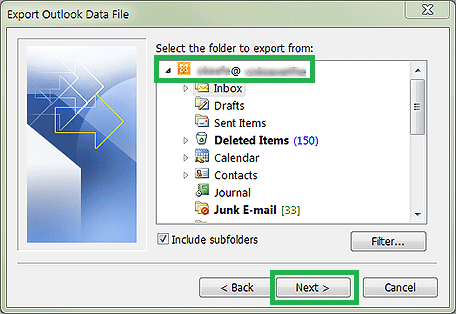
- Select the main folder of the account you are looking to export. This is typically the same name as the email address. Ensure that "Include Subfolders" is checked, then click Next.
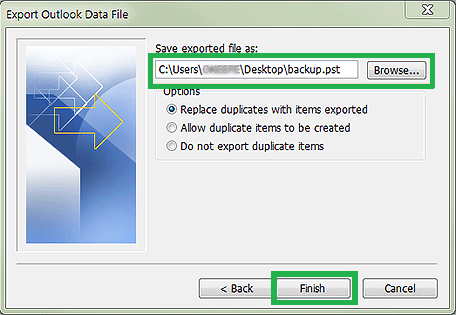
- Choose a location to save your .pst file in. Select "Do not export duplicate items" and click Finish. Outlook will now start to create a .pst file from all of your email folders, calendars, and contacts. There will be a progress bar displayed that will appear to complete multiple times for each folder, or may even go entirely unresponsive and indicate that Outlook is not responding. This is normal. Wait until the progress bar goes away before proceeding.
- Next, remove your existing Smartermail account and set up your Exchange account in Outlook. More detail on how to do this can be found here.
Importing your .pst into Exchange using Outlook
- For Outlook 2003 & 2007:
- Select "Import and Export" from the File menu.

- For Outlook 2010 & 2013:
- From the File tab, click "Open", then "Import".

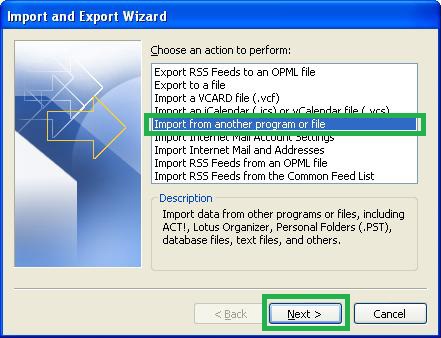
- Select "Import from another program or file", then click Next.
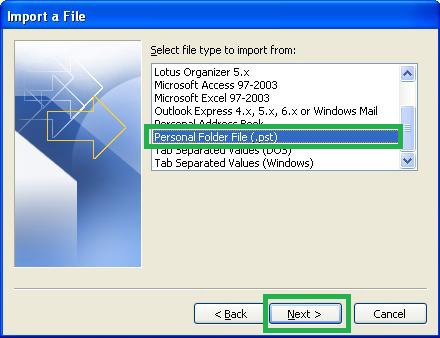
- Select Outlook Data File - may be listed as Personal Folder File -(.pst) from the list, then click Next.
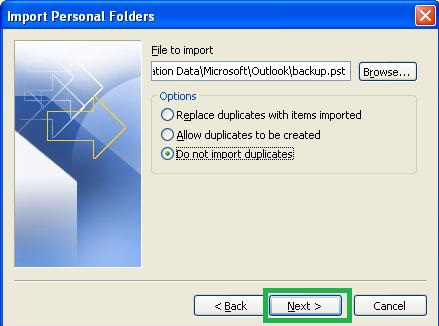
- Select the location of the file that you will be importing (which was saved in the steps above), check the box for "Do not import duplicates", then click Next.
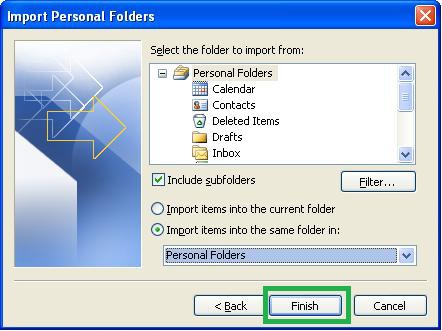
- Select Outlook Data File as the folder to import from and make sure that "Include subfolders" is checked. Check the box to "Import items into the same folder in" then select your Exchange account from the drop down menu. Click Finish. Outlook will now start to import all of the emails, contacts, and calendars from your .pst into your Exchange account. There will be a progress bar displayed that will appear to complete multiple times for each folder, or may even go entirely unresponsive and indicate that Outlook is not responding. This is normal. Wait until the progress bar goes away before proceeding.
- Now all of your mail will be in your Exchange account in Outlook. In the background, Outlook will push all of this email to our Exchange servers where it will be visible in webmail (OWA) or on other devices. Depending on how much email you have, this can take several hours to complete.
If you have any further questions that were not answered in this article, please contact us.
| 


