
Live Chat Software by Kayako |
Knowledgebase: Outlook Web App - OWA
How to Configure an Exchange Autoresponder in Outlook Web AppPosted by on September 03 2015 03:35 PM
|
|
|
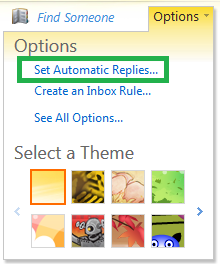
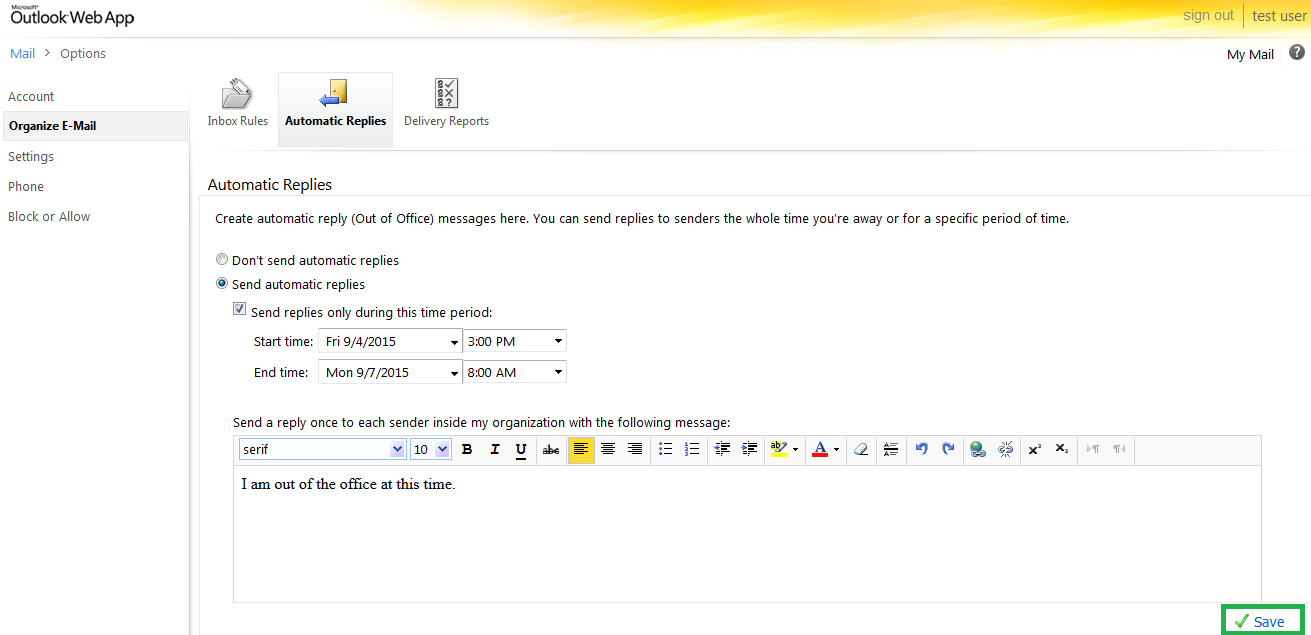
If you will be out of your office for an extended period of time, or if you will not be able to respond to email for any reason, you may find that you need an email autoresponder. The autoresponder will send a preset message on your behalf, so those who emailed you will know not to expect a reply right away. You can easily configure an autoresponder within the Outlook Web App (OWA). This article assumes that you are already familiar with how to log in to OWA. If you are not sure how to do so, please see this article: How to Access Outlook Web App for Exchange
If you have any further questions that were not answered in this article, please contact us.
| |
|
|
|
Comments (0)