|
If you wish to create a Wordpress site on a new plan that does not currently host your domain name, you can utilize a test URL, called the "instant URL", to view the site on the new server before making the changes live. This article will explain how to update your WordPress install to use the instant URL provided to you with your new plan before the domain points to the new server space. There are two ways to trick Wordpress into using the instant URL:
Updating your wp-config.php file
Manually updating your database with PHPMyAdmin
Method 1: Updating your wp-config.php file
- First, you will need to connect to your site via FTP.
- Download a copy of the wp-config.php file to your computer. This file will be in the Wordpress root directory.
- Open the wp-config.php file with a text editor, such as NotePad or Wordpad. Add the following lines to your wp-config.php, where "s#####" is the subscription ID provided to your account. These can be added anywhere within the file, as long as the lines are inside the opening and closing PHP tags (i.e. the very first and very last line need to stay as-is); it may be easier to place them at the top or the bottom of the file for ease of removal later. Note: The instant URL may or may not contain your domain name as part of its path. To find your instant URL, please click here.
define('WP_HOME','http://s######.instanturl.net/yourdomainname.tld');
define('WP_SITEURL',' http://s######.instanturl.net/yourdomainname.tld');
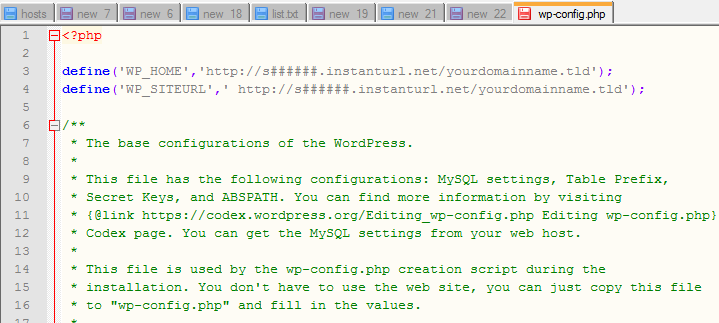
- Once you have saved these changes, upload the updated file back to your website to overwrite the file already in place.
- Later, once you are done developing your website and are ready to point the site to this server, go back in and remove the two lines from this file.
Method 2: Manually updating your database with PHPMyAdmin (PMA)
This method assumes that you are already familiar with how to log in to the customer control panel. If you do not know how to log in or have forgotten your password, please refer to this article first.

- Click the name of the database you wish to update.
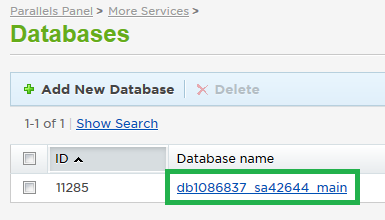
- Click the "Browse Database Manager" link.
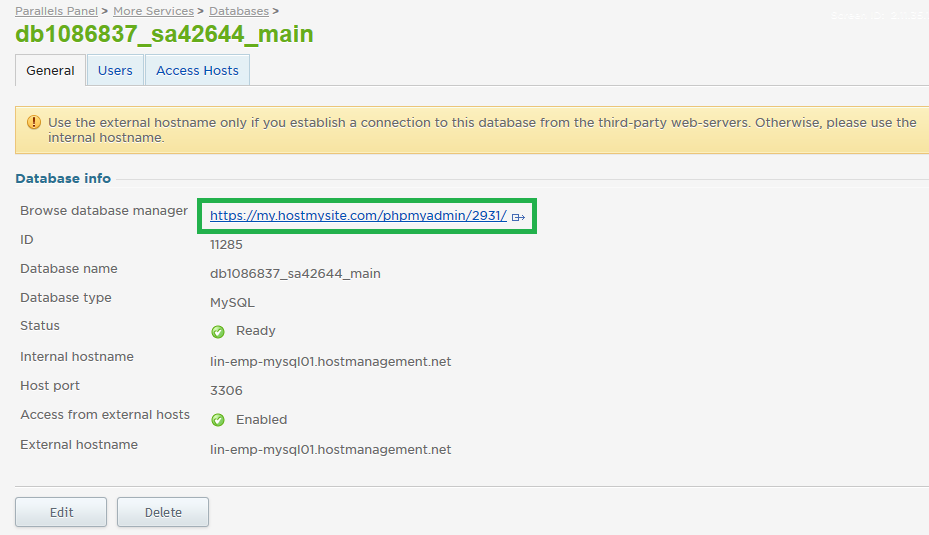
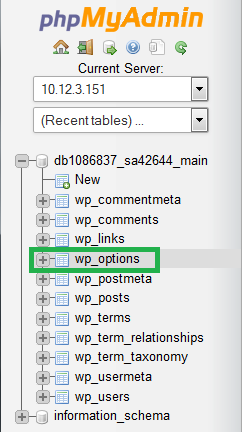
- On the left side menu, click the + icon to expand your database name (you can ignore the Information Schema line).
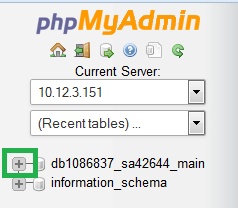
- Click the line that says wp_options. Note: Depending on how you configured Wordpress upon install, the prefix may be something other than "wp", but should always end in "_options".
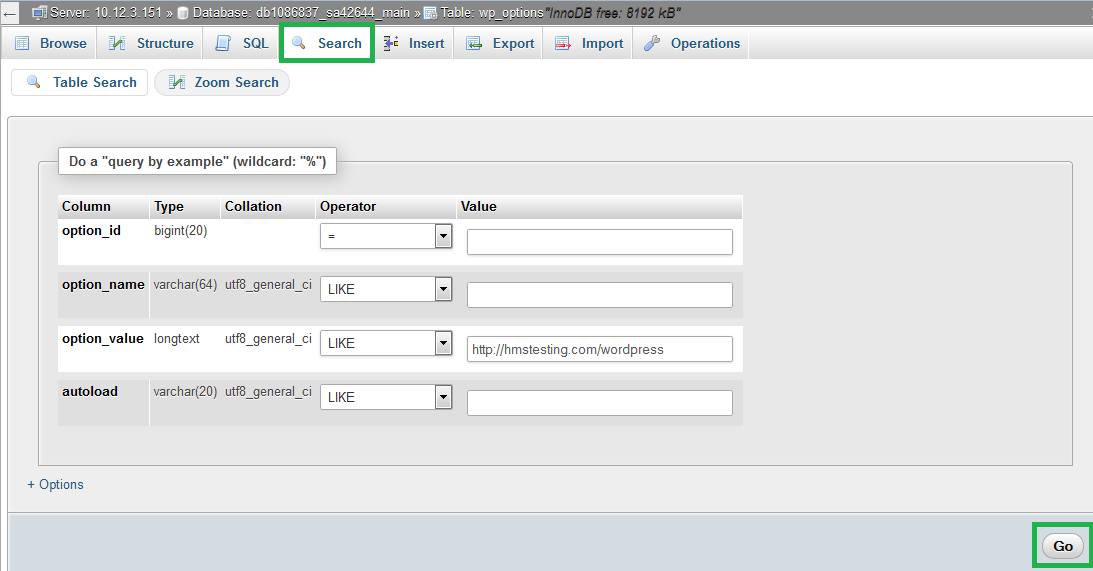
- Click the Search button in the top navigation menu, then enter your domain name in the "option_value" text box. Click Go.
- You should see two lines returned, for option_name siteurl and option_name home.
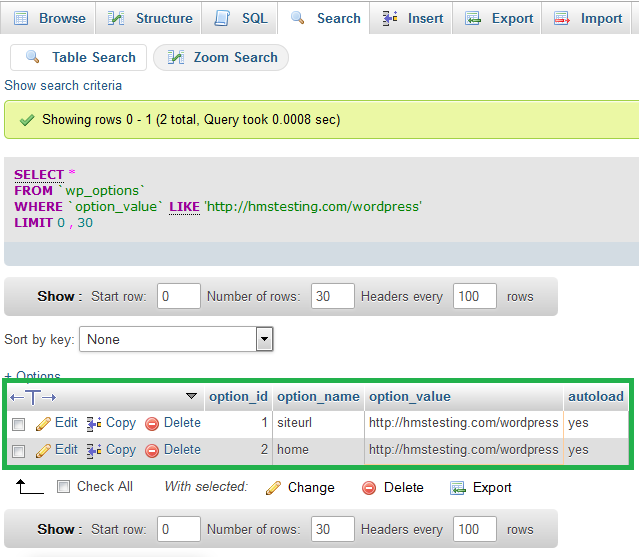
- Double click on the first mention of your domain name to be given a text editing box. Simply replace the existing value with the instant URL. Click anywhere outside this box to save the change. Then, repeat for the second value. This completes the updates to the database which will tell Wordpress to use the instant URL for the site.

If you have any further questions that were not answered in this article, please contact us.
| 
